
ONE YEAR of Work for TEN SECONDS of Film
This video is sponsored by NVIDIA and Puget Systems. Explore the best GPUs from NVIDIA, including the GeForce RTX 5090 series, and discover the top custom PC workstations with a Puget System. https://www.nvidia.com/en-us/ai-on-rtx/ // https://hubs.ly/Q03FBj260
I’ll be doing a deep dive into the techniques I used to recreate this shot. Join me LIVE on Oct 10 or watch the video on our site. Your subscription keeps us alive and independent! ► http://corridordigital.com/
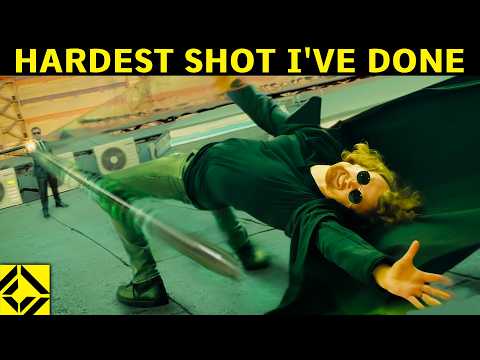
Every once in a while, a shot comes along that pushes the artform forward. It advances cinematic language, or action filmmaking, or visual effects. Bullet Time did all three. I’m gonna try to recreate it with nothing but a personal computer and a coupla phones.
TECH DETAILS ————-
Hey whaddup everybody. Interested in some deeper details on how I approached this shot? I got you covered-
I’m using a Wan 2.1 + VACE workflow here in order to interpolate the keyframes. Utilizing the VACE add-on, you are able to control the Wan 2.1 video model in some pretty unique ways. In this case I’m triggering an inpainting pass, which is controlled by a mask, as well as a neutral gray area in the video frame that will be filled in. This can be used to remove objects in frame, or to bridge a temporal gap between frames.
I’m running this process in ComfyUI, and if you’d like to check out my workflow, you can find it here: https://drive.google.com/file/d/1IdfMIKCKJKvE-z1TqkyMRZOfC1ABt57y/view?usp=drive_link
This process also uses a z-depth control video and a DWpose control video to keep the “Neo” element from getting all mushy, as well as an “outline bounding box” control video to trigger and control the camera orbit. There are a ton of control videos in this! That’s the only reason this worked. I had to throw everything I could at this in order to achieve the level of direct-ability that a shot like this would demand in a movie production. After all, we’re trying to execute a specific vision while also preserving the footage of the actor!
There was a second pass needed in order to help with the rotoscoping process, which was a huge pain. Then of course there are the more conventional parts of the vfx process- camera tracking, compositing, etc.
If you’d like to dive even deeper, join me for the live stream or watch the tutorial video we’ll be dropping on www.corridordigital.com. We have a free two week trial if you’re just interested in this particular project!
Clubbed to Death (EPIC VERSION): https://www.youtube.com/watch?v=ocCzdLhJkSI&ab_channel=EpicTrailerMusicUK
Instagram ► http://instagram.com/corridordigital
Merch ► https://corridordigital.store/
Creative Tools ►
Puget Computers: https://bit.ly/Puget_Systems
Aputure Lights: https://bit.ly/Corridor_Lights
ActionVFX: https://bit.ly/TheBest_ActionVFX
Greyscale Gorilla: https://bit.ly/GreyscalegorillaPlus
Cinema4D: http://bit.ly/Try_Cinema4D
Houdini: https://bit.ly/HoudiniSims
Nuke: https://bit.ly/Nuke_Compositing
JangaFX: https://hubs.ly/Q030gZZ20
KitBash 3D: https://KitBash3D.com/?ref=corridorcrew
Octane Render: http://bit.ly/Octane_Wrender
Rendering: https://bit.ly/TheRenderNetwork
Epidemic Music: http://bit.ly/Corridor_Music
Chapters ►
0:00 The Discovery
9:35 Photography
16:51 The Magic In-betweens
21:26 The Background Saves us
25:48 Big Reveal